While the Celtic D Karimba is made for, and excels at, all sorts of jigs and reels and waltzes, I’m going to show you in this first lesson what it loves to do the most: a very simple two-chord progression.
You don’t even need to know what a chord progression is – you just follow the colors on the tines.
I suggest you mark the tines of these two chords with two contrasting colors of Sharpie markers. The marks help make playing the chords very simple and can easily be removed with an alcohol wipe. I use green and red in this case.
The beauty of this system is that you can play any and all of the green tines, in any order, and then switch to any and all red tines, and it will sound just great! And this technique can be applied to any kalimba, once you learn a few chords, helping you master once-difficult concepts with serenity. This lesson is illustrated in the video that plays when you open this page.
A chord is usually a triad – that is, the 1, 3, and 5 (first note, third note, and fifth note) of some particular scale. A feature of any chord is that it brings together a combination of tones that sound good in some particular way.
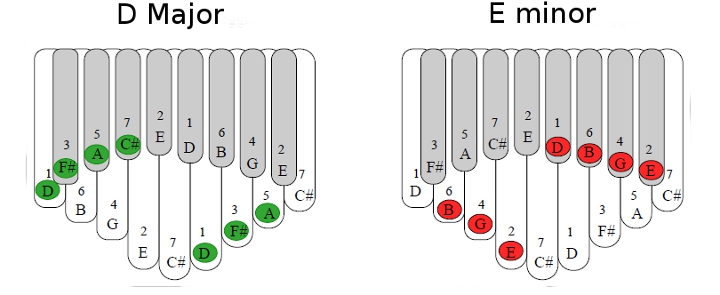
The D major chord is formed when you play the green tines in the diagram. Don’t worry about how to play them all at once. Play the notes one at a time. Experiment with the order and timing.
The Celtic D Karimba is in the key of D major, and in the tuning diagram, you can see that D, F#, and A – which happen to be the 1, 3, and 5 of the chord – are marked in green, and are right next to each other. These tines make the notes of the D major chord, and on this karimba they are found both on the lower right, and also an octave higher on the upper left.
These tines are all marked green, and you have the green light to go. Proceed, with wild abandon. You can go crazy on these tines! You have total freedom within this green space.
Now, here are some items to contemplate for more measured playing:
The tines marked with red form the Em or E minor chord. It looks like the Em chord is made up of 2, 4, and 6… but those numbers are referenced to the D major scale. The notes E, G, and B, are the 1, the minor 3rd, and the 5 of E – but you don’t really need to know that.
All you need to know is how the notes of the E minor chord sound when you play them one after another. You don’t need to know what note you are playing. However, since this is the E minor chord, it is helpful to know which tines are E, so you can emphasize them by playing them louder, or playing them more often, or playing them on strong beats (like at the start of a measure).
In the upper octave, we have added the D, which is the minor 7th of E – so if you play that high D, you have an Em7 or E minor 7 chord. The lower case “m” stands for “minor.”
Sorry, that was M.A. Holdaway, PhD talking. What does that mean?
If you colored your tines, almost every single tine is colored. Almost half the tines are green. Almost half the tines are red. We just simplified this 17-note kalimba into two 7-note kalimbas, DM7 and Em7.
You don’t always want to split the kalimba up into two 7-note kalimbas, but check out what happens if you do.
Start out in the D space – do something of your own creation using the DM7 tines. Do that for some amount of time – four beats? Eight beats? Not too short and not too long. When you are done playing in the D space, shift over into the E space.
When you shift into the E space, one of the things you can do, that sounds really good, is to copy what you did for the D space… but in mirror image. Whatever pattern you did in D with the right thumb on the lower row now needs to be accomplished with the left thumb on the lower row. Ditto for upper left to upper right.
In order to take what you did in the D space and flip it into the E space, you will need to pay attention to what you did in D space. If it is too complicated, too long, or too irregular, you won’t be able to copy it. So start with simple things that are simple to mirror from D space to E space. As you are successful, raise the bar with longer or more complex musical phrases.
While it seems that this is a very simple suggestion for making music on the Celtic-D kalimba, you can spend hundreds of hours exploring this one avenue. Of course, it also opens the way to other similar sorts of avenues, between other chord pairs. And then comes more complicated chord progressions.
But don’t get dizzy just yet – unless the thrill of going back and forth between two chords makes you dizzy! It is actually a huge step in the direction of more musical kalimba playing, like learning to finger paint with one color at a time rather than all the colors at once.

 Christmas in July 2025
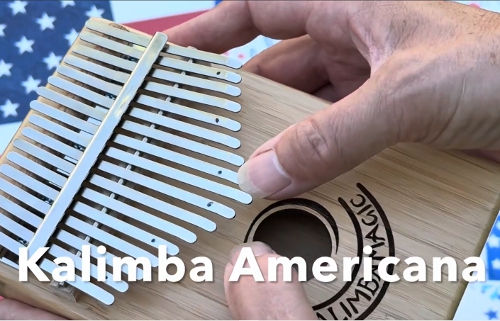 Patriotic and American Music for Kalimba