While the sound of buzzers (or rattles) on a karimba is very distinctive, it is not for everyone. Also, the term “buzzers” (which create an intentional sound effect) is very different from what we call the “buzz,” which is an unwanted and unpleasant sound that results from an improperly seated tine. We deal with fixing the “buzz” in another article.
This article explores the role of karimba rattles in African music, looks at some of the different ways of making the rattles, and shows you how to take the them off – or put them back on – the Hugh Tracey karimba. I also mention one of my favorite ways to soften the sound of the Hugh Tracey rattles, which, at least to my ear, makes a very pleasing sound.
B. Michael Williams, the well-known kalimba authority, tells a lovely story in one of his YouTube videos: The wood of the kalimba represents the earth, and the tines represent the animals and plants that live on the earth. When those living things act on this earth, the earth vibrates. There is no action on earth that escapes the attention of the spirits of the ancestors – and the ancestral voices chime in through the kalimba’s rattles.
Here is another analogy I appreciate: The pure sound of a kalimba tine can be almost too pretty to behold, while the sound of a tine surrounded by its buzz is like a high mountain peak shrouded by obscuring mists.
Consider what the buzz does to the kalimba sound:
There are quite a few different ways to make the rattle sound on a kalimba. You could loosely fasten anything that’s hard to it . You could get a tiny bracelet or necklace chain and just drape it onto the kalimba body. You could nail a metal bottle cap to your kalimba’s body – just make sure the nail has some play in it so the bottle cap can vibrate. Or you could do what the ancients did in Africa – stitch the shells of land snails onto your kalimba body. Why don’t they do that anymore? Basically because snail shells break (and bottle caps don’t).
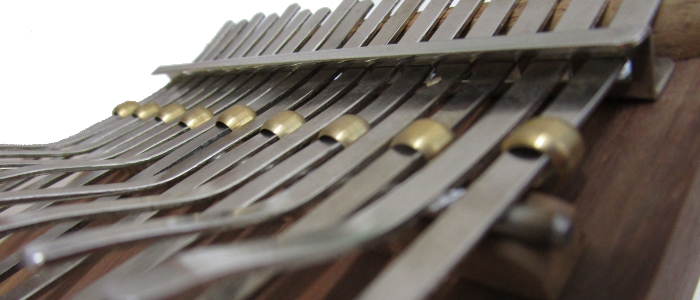
Or you could do it the Hugh Tracey way, and slide tiny metal beads onto your kalimba tines, situated between the bridge and Z-bracket so they don’t come off.
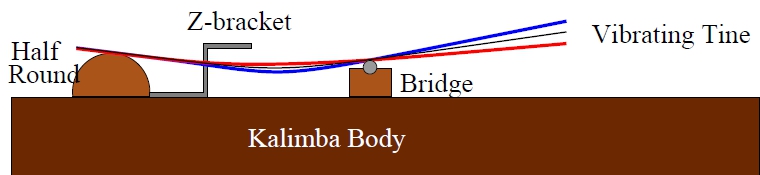
Check out this diagram of the Hugh Tracey kalimba. It is instructive on how the Hugh Tracey kalimba is built and how the tines vibrate. The dark brown is the kalimba body. From left to right:
The tine will oscillate between the red and blue extremes – you can actually see this with your eye, as the tine looks like a blur. Our eyes just aren’t fast enough to see the tine reach its top and bottom positions. The brain makes a visual image about once every 1/30th of a second, which is good enough to actually resolve motion at about 15 Hz (15 ups and 15 downs per second) – which is just a bit too slow to hear. On the other hand, A 440 Hz would require that you “snap a photo” about once every 1/1000th of a second – much too fast to see, so we see the movement as a blur.
Now to the point, which is about how to effect the sound of the buzzers. The Hugh Tracey buzzers are metal beads that go around a tine, and are trapped in between the Z-bracket and the bridge. The buzzers are free to travel around in that zone, which randomizes the rattle. When the buzzer is right in the middle of that zone, the buzzer is jostled the most by the tine as it vibrates down and up, and it will make the loudest rattling. You can actually get a softer rattle by tilting the kalimba head down so the buzzers tend to hide under the Z-bracket, where there is almost no amplitude to the tine’s vibrations. And you can have even more impact: Tilt the kalimba head down and then put a piece of scotch tape over the tines, trapping the buzzers under the Z-bracket. This gives a nice warm vibration that I like a lot.
On the other hand, if you don’t like the kalimba rattling at all, just follow the easy directions shown in the video below: lift the tines just off the bridge such that the buzzers can slip past the bridge and off. But do save them; someday you might want to put them onto your kalimba again.

 Christmas in July 2025
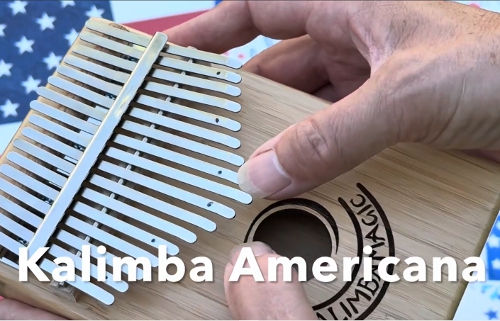 Patriotic and American Music for Kalimba